Table of Contents
To bulk import your menu, you will need a CSV file that includes the menu details such as item name, description, price, images, and filters (veg, non-veg, combo).
CSV File Structure: #
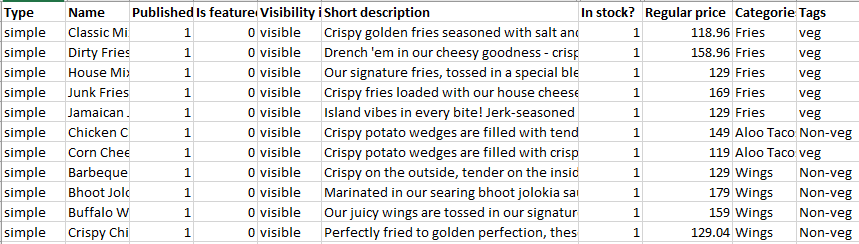
Your CSV file should have the following columns:
Here is the mapping for the fields shown in your CSV:
| CSV Column | WooCommerce Field | Description |
| Type | Product Type | Set to “simple” for simple products or change based on your product type. |
| Name | Product Name | The name of the menu item. |
| Published | Published Status | Set to “1” if you want the product to be published, or “0” if it’s a draft. |
| Is featured? | Featured Product | Set to “1” for featured products, or “0” for non-featured products. |
| Visibility in catalog | Catalog Visibility | Set to “visible” for products to be displayed in your store catalog. |
| Short description | Short Description | A brief description of the menu item, which may appear alongside the product in some layouts. |
| In stock? | Stock Status | Set to “1” if the product is in stock, or “0” if out of stock. |
| Regular price | Regular Price | The price of the menu item. |
| Categories | Product Categories | The category under which this item falls (e.g., “Fries”). |
| Tags | Product Tags | Tags like “veg” or “non-veg” to label dietary preferences or other characteristics. |
Once you have confirmed these mappings in the WooCommerce importer, click Run the Importer to proceed.
Make sure your CSV file is saved in UTF-8 format.
How to Create a CSV: #
- Open a spreadsheet program like Google Sheets or Microsoft Excel.
- Add the columns listed above (Name, Description, Price, etc.).
- Fill in your menu data.
- Export the file as CSV by choosing File > Download > Comma Separated Values (.csv).
Download Sample CSV here
For Example: